
 |
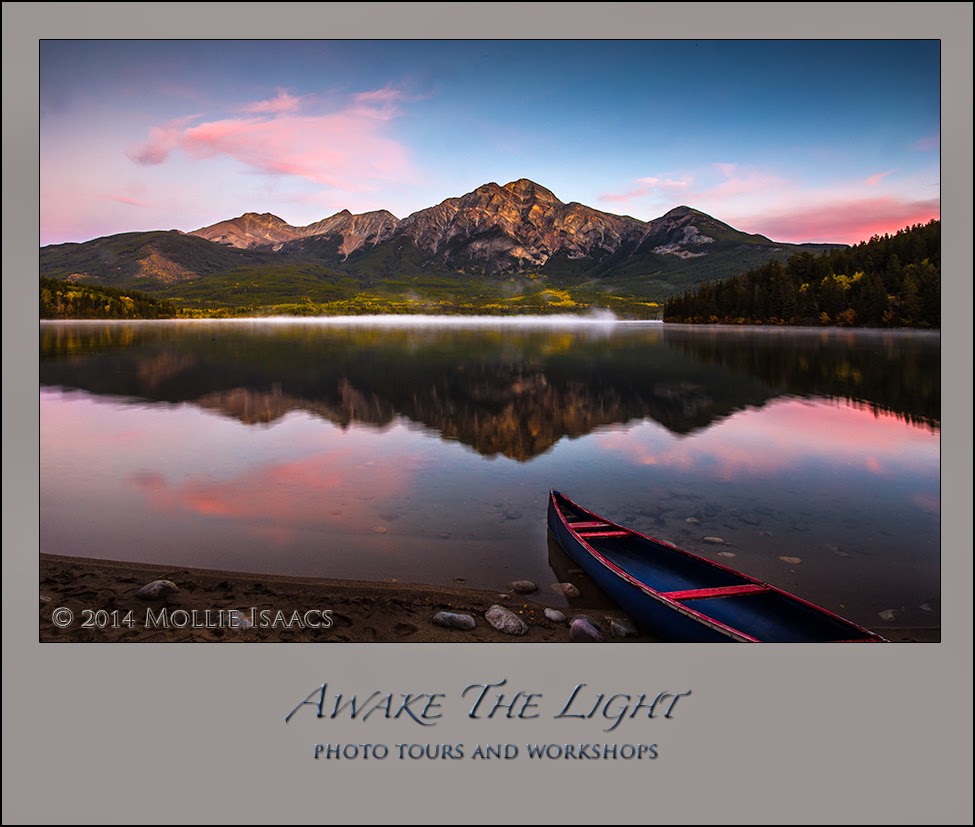
| AFTER |
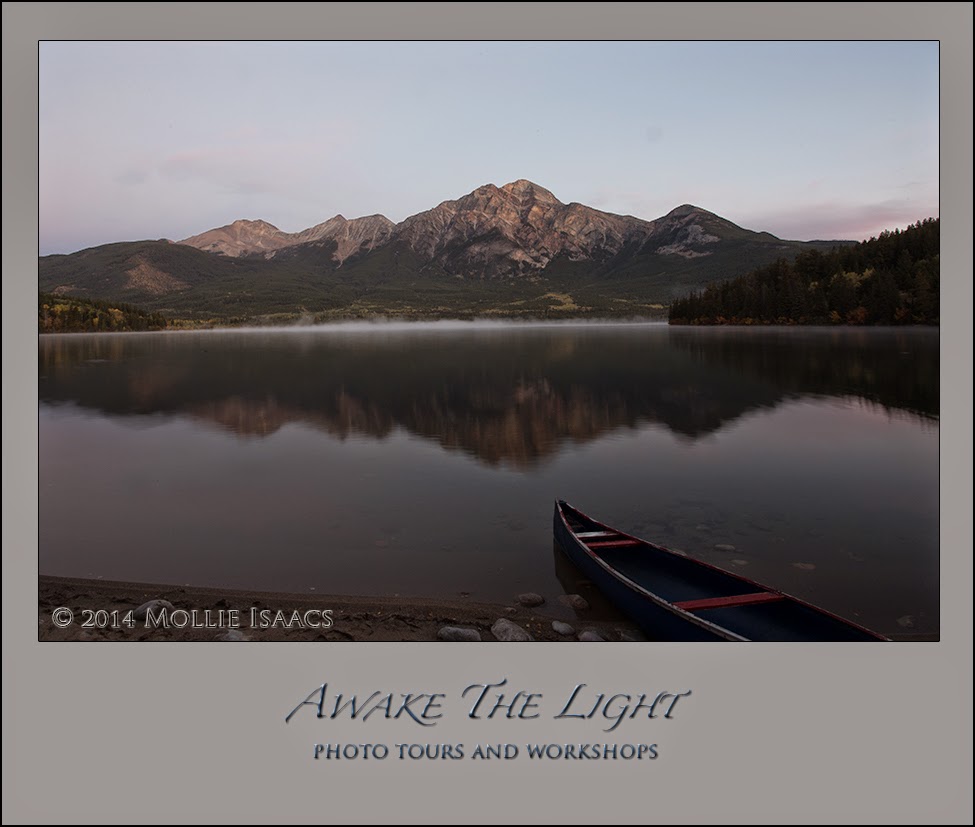 |
| BEFORE |
What a difference a little image optimization can make! These are Before and After representations of the same image. It was a beautiful, pristine dawn in Jasper National Park in Canada, but you would never know that by looking at the Before image. It looks gray, dull, and unexciting. While there were pinks and blues in the sky, and lovely fall colors on the hillsides across the lake, they did not appear in the image that was downloaded out of the camera.
In general, regardless of the brand of camera you use, sensors (the sensor "sees" what the lens sees, digitizes it, and then places it on the memory card) are designed to be "dumbed down." What does that mean? It means that manufacturers have designed sensors to do their jobs quickly, and in order to do that the sensor will capture an image without taking the time for perfect replication of the range of contrast or the depth of color that is really there. While that is a bit of an oversimplification, the bottom line is that you will rarely see the degree of contrast and the accuracy of colors in an image as it comes out the camera. Some image optimization is needed on virtually every image in order to bring out what you really saw. Some images need more optimization than others.
This image, because it was pre-sunrise, inherently had very low contrast and the colors are somewhat muted. Add to that the nature of sensors, and the resulting Before image is very gray with minimal color. I wanted to bring out what I saw when I was there, and that required some help from Lightroom.
The "fix" took less than 5 minutes and returned the image closer to what was really there. I admit that I did punch the pinks and blues a bit more than were really there, but still they look natural. In nature and wildlife photography, it is generally better to not go overboard with optimization. You want the final result to look real and believable.
The simple steps used in Lightroom to improve this image were:
1. Lightened the shadows with the Shadows slider.
2. Brightened the whites with the Whites slider so that the mist at the horizon line looked white.
3. Increased Clarity to boost mid-tone contrast.
4. Increased overall Vibrance.
5. Used the HSL panel to pinpoint increases in the saturation in the pinks, blues, and yellows.
Lightroom is simple software to learn and to use, BUT it is all too easy to get confused if you don't learn it properly at the beginning. While there are many online tutorials, they often do not explain what to do and how to do it in a simple, logical way. Many photographers do better in a real classroom with an instructor there with them. Experienced users sometimes need help to unlearn bad habits or relearn proper methods. Novices will learn properly from the beginning and be on a smooth road from that point forward. If you would like to take a REAL class, here is info on one coming up in March http://awakethelight.com/lightroom-2014/ This is a great opportunity to learn Lightroom properly once and for all, regardless of your experience level.
TECHNICAL DATA
Shutter Speed 2.5 seconds. Aperture f/22. ISO 200. Lens: Canon 17-40mm f/4L set at 17mm. Camera: Canon 6D. Gitzo tripod with Really Right Stuff hallhead.
TODAY'S QUOTE: "Learn as if you were to live forever." --Mahatma Gandhi
No comments:
Post a Comment