Saturday, August 30, 2014

Rocky Mountain High

AFTER

BEFORE


I have arrived in the beautiful state of Montana. This is only my third visit to this incredible state, and each time I see and appreciate more of its unique beauty. I am currently in Glacier National Park with its spectacular peaks, beautiful blue lakes, and narrow winding mountain roads.

Today’s photo was taken on the drive through the park from the airport. It was late in the day and the air was a bit hazy, but this glacial valley was huge and beautiful, so I took a few shots.

I was disappointed when I downloaded it, but decided to see what Lightroom 5 could do. As is usually the case, Lightroom came to the rescue. With just a few quick modifications, the real beauty of the image was revealed. Here is what was done:

1. Decreased Highlights
2. Increased Shadows
3. Boosted Clarity (it is rarely necessary to raise Clarity more than 30 points)
4. Increased Contrast (this is only the second time I have ever used Contrast in Lightroom; usually it is too heavy handed and can over-do an image in a heartbeat; but because of the haze, it worked to cut through the mist and allow more of the color to show.
5. Graduated filter to darken the sky

So once again, Lightroom proved itself to be an invaluable tool. If you want to learn Lightroom or want to improve your skills, consider taking the next Awake The Light “Lightroom Unleashed” workshop coming up March 16 – 20, 2015, to be held in Richmond, Virginia. This is a convenient location, an easy drive from many places, and also with easy airport access. Details are not on the website yet, but if you are interested, please email awakethelight@charter.net for more information. This class generally fills quickly, so don’t delay.

TECHNICAL DATA
Shutter Speed 1/400 sec.  Aperture f/11.  ISO 400.  Lens: Canon 70-200mm f/4L IS, set at 70mm.  Camera: Canon 5D Mark III.  Handheld.

Tuesday, August 26, 2014

Yes Or No?


What's your opinion of  this image? Like it? Hate it? Why?

Let me know your thoughts. Do you find it serious or comical?

In case you need to know, it is a Great Blue Heron just taking off from a pond. His entire body is in the original image, but it was cropped to show just this section.

Email your responses to me at awakethelight@charter.net   I'll reveal how it fared in a few days. 

TECHNICAL DATA
Shutter Speed 1/2500 sec.  Aperture f/14.  ISO 800.  Lens: Canon 200-400mm f/4L IS with built in 1.4 extender plus an external 1.4 extender for an effective focal length of 784mm.  Camera: Canon 5D Mark III. Gitzo tripod with Really Right Stuff ballhead and Wimberley Sidekick.

TODAY'S QUOTE: "Oh crop."  --Mollie Isaacs

Monday, August 25, 2014

Playing The Odds


Orchids are gorgeous flowers, plain and simple. But they are not easy to photograph.

These cultivated orchids inside a hothouse were especially difficult to photograph because of the unappealing background. Not only was the background unattractive, but it was quite close to the flowers. The closer the background is to the subject, the harder it is to use depth of field to blur the background. There is just not enough space between the subject and the background for depth of field controls to have much success.

What saved this image was the lighting, and how cameras react to contrast.

The flowers were lit by a bank of windows high up on the wall behind me. The light coming in was strong enough to light the white flowers well, but allowed the darker background to go quite dark by comparison. It was a high contrast situation - well-lit white subject with a darker background which appears almost black.

Our eyes, unlike a camera, are attuned to see detail in all areas of a high contrast scene. We do not see the degree of contrast the way our cameras do. So it is important to view the image on your camera's viewscreen to get a sense of how the contrast will appear in the image. Even so, you might have to use image optimization software to darken the background a bit more. In Lightroom 5 that is easily accomplished by moving the Shadows slider to the darker side.

Always pay close attention to your histogram, especially with high contrast subjects. It is easy to overexpose the bright tones. If you see the "blinkies" appearing in substantial portions of the image (also called the "flashies"  -  how long did it take the digital brainiacs to come up with those highfalutin words!?), then use Exposure Compensation to reduce exposure about 2/3rds of a stop. Take another shot and check the histogram again. If necessary, reduce exposure a bit more.

TECHNICAL DATA
Shutter Speed 1/1250 sec.  Aperture f/4.  ISO 1600.  Lens: Canon 70-200mm f/4L IS, set at 160mm.  Camera: Canon 5D Mark III.  Handheld.

TODAY'S QUOTE: "If you truly love nature, you will find beauty everywhere."  -- Vincent Van Gogh

Thursday, August 21, 2014

One Good Tern Deserves Another


Terns are fast-moving flying machines. They can change direction in a heartbeat, with no warning. Trying to photograph these beautiful and delicate hunters can be quite challenging.

When photographing birds in flight, it is important to have your camera set properly. A high ISO of at least 800 on a sunny day and much higher, perhaps 1600 or 3200 on a cloudy day, is recommended. A high ISO will allow you to use both a fast shutter speed and a small aperture for good depth of field. It will also mean that your images will show noise (similar to film grain in the old days), so some noise reduction software is helpful. I use the noise reduction feature in Lightroom 5.

A shutter speed of at least 1/1000 sec for moving birds, and an aperture of at least f/11 or smaller will give you the best chances of freezing motion and keeping most parts of the bird sharp. But what is the best way to focus and keep things in focus as the birds quickly change position?

For Canon shooters, use AI Servo. Nikon shooters use Continuous. As mentioned in a recent blog, setting your camera for Back Button Focus is an important first step toward having full control over focus, regardless of what subjects you shoot. If you have not read that blog, check it out at http://awakethelight.blogspot.com/2014/08/back-button-focus.html

But back to AI Servo / Continuous, this control allows you to track a moving subject and keep it in focus as it moves. Depress the focus button and hold it down as you follow the movements of the subject. The camera's focusing mechanism will continually focus on the subject, sensing the change in distances between the moving subject and the camera. It's a little bit of magic.

While it is not foolproof all the time, it is quite good and generally is much faster and more accurate than attempting to manually focus on a fast flying bird. Your best chances of success are to combine this focusing method with setting your viewfinder to show only ONE focus point rather than the several focus points that most cameras are set up for. I set mine for only the center rectangle viewable in the viewfinder. I keep that centered on the bird's head as much as possible, guaranteeing good focus of the head and eyes. Then I crop later as needed if I don't want the bird to be dead center.

A question was asked about whether to keep your camera always set to AI Servo / Continuous regardless of whether your subject is moving or not. Some recommend that approach, rightly pointing out that even set that way, when you remove your finger from the focus button, the focus locks in and will not change until you press the focus button again. I have experimented with that for the past year or two. My conclusion, based on what works best for me, is to NOT leave the camera set to AI Servo / Continuous all the time. I found that occasionally I was absentmindedly keeping my thumb on the focus button at times when I intended to lock in the focus and be done. In addition to using AI Servo for tracking birds in flight and fast moving wildlife, I use it for macro with fairly good success, especially when it is breezy and flowers are blowing a bit.  But for scenics, still lifes, and other non-moving subjects, I generally use One Shot. 

TECHNICAL DATA
Shutter Speed 1/2000 sec.  Aperture f/18.  ISO 800.  Lens: Canon 200-400mm f/4 with built-in 1.4 extender plus external 1.4 extender for an effective focal length of 784mm.  Camera: Canon 5D Mark III.  Gitzo tripod with Really Right Stuff ballhead and Wimberley Sidekick.

TODAY'S QUOTE: "If you were born without wings, do nothing to prevent them from growing."  --Coco Chanel

Tuesday, August 19, 2014

Simply Surprising


Sometimes you get a pleasant surprise. This image of a stream in the Great Smoky Mountains National Park is a favorite of mine. The sunset light was magical for just a few minutes, and I was very lucky to have been in the right place at the right time.

Because I like this image so much, I decided to enter it in the annual Professional Photographers of America image competition. I have entered scenics before, and they rarely do well. While the judges seem to like scenics, they are not wowed by them. Often they get just a ho-hum score, and frankly that is what I was expecting.

So I was happily surprised when this image was selected to become part of the organization's Permanent Loan Collection. I can only assume that the quality of the light was a big part of why the image did well. Whatever the reason, I am thrilled that one of my favorite images was a front-runner with the judges.

If you have an image you love, even if you fear that the judges might not respond well to it, go ahead and enter it. You never know when a surprise win will come your way!

TECHNICAL DATA
Shutter Speed 2.5 seconds.  Aperture f/32.  ISO 100.  Lens: 70-200mm f/4 IS set to 93mm.  Camera: Canon 5D Mark III.  Gitzo tripod with Really Right Stuff ballhead and Wimberley Sidekick.

TODAY'S QUOTE: "I'm not in competition with anybody but myself. My goal is to beat my last performance."  --Celine Dion

Sunday, August 17, 2014

Island In The Sky


Pre-dawn on a mountaintop. Cold. Awoke in the middle of the night to drive to the location in order to be set up at first light. Crazy? You bet! Exhilarating? Yes!

Sometimes to get the shot you have to suffer a bit. And sometimes, in spite of all your best preparation, the shot never happens. While this was not the shot I envisioned when I decided to head out in the wee hours, it still worked well enough.

I had hoped for a very windy day, and planned to use a slow shutter speed to blur the motion of the clouds. As it turned out, there was just a light breeze which caused some blur of the clouds in front of the low ridge, but not enough to move the thicker clouds very quickly. Even with this 30 second exposure the thick cloud cover looks stationary.

When photographing sunrise from a high mountain, it is best to arrive at least an hour before the officially stated sunrise time. That is because the sky begins to lighten long before the actual sunrise, and much earlier than if photographing at a lower elevation. Arriving that early means you will be setting your camera up in the dark, so bring a flashlight, or better yet, a headlamp to light your way.

Choose a small aperture of f/16 or greater for good depth of field. Focus will be difficult, but as soon as there is a hint of light in the sky, your autofocus will be able to grab onto an area of contrast. In this image it was where the dark trees met the lighter clouds.  You can manually focus as well, but I have better success with autofocus.

Live View is not the best choice in very low light situations, so I do not use it.

You will also need a sturdy tripod and either a cable release or a remote timer.


TECHNICAL DATA
Shutter Speed 30 seconds.  Aperture f/18.  ISO 400.  Lens: Canon 70-200mm f/4L IS, set at 70mm.  Camera: Canon 5D Mark III.  Gitzo tripod with ballhead.

TODAY'S QUOTE: "There was never a night or a problem that could defeat sunrise or hope."  --Bernard Williams

Thursday, August 14, 2014

Back Button Focus


As promised, here is information on Back Button Focus (also called rear button focus).

In the old days before autofocus was invented, the shutter button had only two functions: press down partway to take a meter reading, and then press down fully to take the picture. Focus was not tied to the shutter release. To focus, you manually turned the focus ring on the lens.

But since the advent of autofocus, we now have 3 separate functions occurring on the shutter button. That was a poor decision on the part of camera manufacturers. By tying the focus function to the same button as tripping the shutter, it  means that each and every time you press the shutter button, your camera attempts to re-focus. The net effect is that a series of images of the same subject can vary in focus even if neither you nor the subject has moved. Each time the lens has to hunt for focus, there is a good chance that it will not lock onto the precise area you want sharp.

But not to worry, there is an easy fix. Remove the focus function from the shutter button and put it someplace else. Most camera bodies allow you to do that by moving the focus to a button on the back of the camera body. This is still the same autofocus as always, you just press a different button than you did before. While you may balk at this at first, it is the best thing you can do for your photography of any subject, regardless of whether it is a stationary subject or a bird in flight.  If you have a choice, set the focus function to the "AF-ON" button rather than other buttons that might also give you that option.

Most Owner's Manuals are notoriously bad at providing this information. For virtually all cameras, it is a Custom Function setting. For some cameras two separate functions have to be set in order to remove the focus from the shutter button AND move it to a back button. The best way to get the information clearly is either on YouTube or other sites that will come up during a google search. This is the YouTube link   http://www.youtube.com/  Once on the site, type in your camera body in the search box near the top of the window. Here are a few links to get you started:

for Nikon  -  http://www.youtube.com/watch?v=gd2zk9FRjUE
http://www.youtube.com/watch?v=WyPv1bLkwqA&list=PL703F1832A905834A
http://www.youtube.com/watch?v=gd2zk9FRjUE&list=PL703F1832A905834A

for Canon 5D Mark III  -  http://www.youtube.com/watch?v=xqX1FO1XGFI&list=PL703F1832A905834A
for Canon 60D  -  http://www.youtube.com/watch?v=1F4KFyz7KoE&list=PL703F1832A905834A

Once you have moved the focus function to a button on the back of your camera, you will use your thumb to activate that button, and your index finger to use the shutter button as always. It might take a little time to get used to it, but it will make your life so much easier. For this shot of a church in Charleston, SC, I focused on the chandelier in the ceiling, using my thumb to activate the back button focus. Then I took a series of shots from the same position, and did not need to focus again. Once I knew the chandelier was sharp, I could take many exposures by activating the shutter button, knowing that the point of sharpest focus would not change because neither I nor the chandelier was moving.

TECHNICAL DATA
Shutter Speed 1/100 sec.  Aperture f/4.  ISO 800.  Lens: Canon 17-40mm f/4L, set at 29mm.  Camera: Canon 5D Mark III.  Handheld.

TODAY'S QUOTE: "Focus on your potential instead of your limitations."  --Alan Loy McGinnis

Tuesday, August 12, 2014

Sea For Two


Autumn in Alaska is a great time to see mother sea otters and their babies. The baby (on the right) is almost full grown, but still has his baby fat. Immature sea otters cannot dive because of their high proportion of body fat, and have to be dragged under water by their mothers. They don't seem to mind since that allows them to catch a good meal.

Sea otters are among the cutest animals around, and I never get tired of looking at them. They seem to like the people on the boats in their home waters, and almost always stare back at the camera. Very obliging subjects!

Because they float in place for long periods of time, it is relatively easy to find a pair or a pod of several and shoot away. For most subjects I prefer to use autofocus. It allows me to get sharper images most of the time. The trick for getting sharp images is to set your camera to have just one focus point in the center of your viewfinder, and as much as possible, place that center spot over the head or eyes of the animal. Then focus. It works best if you use rear button focus (also called back button focus), rather than focusing by using the shutter button as most cameras do. Rear button focus is a custom function found on most digital SLR cameras and many 4/3rds mirrorless cameras.  By removing the focus function from the shutter button, the camera will not automatically focus each and every time you press the shutter button, thereby providing more consistently sharp images when neither you nor the subject has moved.

(An upcoming blog will discuss rear button focus in more detail.)

Watch for announcements for 2 great photo tours to Alaska in August and September of 2015.

TECHNICAL DATA
Shutter Speed 1/800 sec.  Aperture f/5.6.  ISO 400.  Lens: Canon 400mm f/5.6L.  Camera: Canon 5D Mark III.  Handheld.

TODAY'S QUOTE: "...for whatever we lose (like a you or a me), it's always ourselves we find in the sea."  --e.e. cummings

Sunday, August 10, 2014

Blue On Green


Backlight is one of my favorite types of lighting, but it can be hard to deal with when photographing wildlife. This is classic backlight  -  all the light is coming from behind the Great Blue Heron, lighting the grass and edge-lighting his head and body. Notice that no light is striking the front of his body directly.  His body is being lit by ambient light, and some brightness reflecting up from the water.

When shooting backlit subjects, take a basic meter reading and then check the histogram. Sometimes it will be beneficial to increase the basic reading by one stop to make sure that the front of the body has received enough exposure. It is very easy to underexpose the main subject in a backlit scene.

I made at least one mistake when taking this shot. Just prior to my spotting this heron by the edge of the stream, I had been photographing birds in flight. In order to get a fast enough shutter speed to freeze their wing action, I had increased the ISO to 3200. But this shot did not need a fast shutter speed, nor did it need such a high ISO. The higher the ISO, the more noise is introduced into the image. I should have reduced the ISO to 800 for this series of shots, but I completely forgot that I had set the ISO so high. I was just happy to see this handsome subject standing in a great spot and beautifully lit.

Even so, using noise reduction in Lightroom removed most of the noise, so I was lucky that my mistake did not negatively impact this image. Most mistakes or oversights can be handled by Lightroom if you are careful in your optimization techniques.

TECHNICAL DATA
Shutter Speed 1/5000 sec.  Aperture f/8.  ISO 3200.  Lens: Canon 200-400 f/4L IS with added 2x external extender for an effective focal length of 800mm.  Camera: Canon 5D Mark III. Gitzo tripod with RSS ballhead and Wimberley Sidekick.

TODAY'S QUOTE: "Creativity is allowing yourself to make mistakes. Art is knowing which ones to keep."  --Scott Adams

Thursday, August 7, 2014

Textures


While this is a yellow hibiscus flower, the image is more about the texture than the actual subject. What attracted me to this flower is the texture of the yellow curls on the petals. Hibiscus flowers have complex attributes which can make them difficult subjects. It helps to reduce the complexity by concentrating on the simpler aspects as much as possible. 

The stamen and pistils were deliberately positioned at an angle rather than straight up and down. That helps add a sense of movement and keeps this square composition from being too static.

Simple techniques can help make all the difference in an otherwise unexciting image. When working with any subject, take some time to consider your options and then use your imagination to create unique images that have eye appeal.

Some options used in this image include eliminating all the background, use of color harmony, and the angular technique mentioned above. So pull out all the stops, take the time to really look at the subject and all its attributes, and take images from a variety of angles.

TECHNICAL DATA
Shutter Speed 1/200 sec.  Aperture f/5.  ISO 400.  Lens: Canon 100mm macro f/2.8L IS.  Camera: Canon 5D Mark III.  Handheld.

TODAY'S QUOTE: "Time is the most valuable thing a person can spend."  --Theophrastus

Tuesday, August 5, 2014

Night Time's The Right Time


Pre-dawn shots when there is a full moon can be challenging but fun. This scene was shot about 2 hours before sunrise when the full moon was hidden behind dark gray clouds. The moon provided enough light to enable me to record the scene with great detail.

Setting up in total darkness is the first challenge. Having a headlamp (a flashlight on a band that snugs around your head) is a great help. It lights your way when walking over uneven ground, and enables you to see your camera settings. Get your camera set up as much as possible the night before, so you will not be fumbling with too many controls once you arrive on-site.

It is also wise to scope out the location in daylight a day or two prior to the shoot.

In such dim light, the easiest thing to do is to take an overall meter reading of the scene, take the shot, and then check the histogram. The histogram will be skewed off to one side since most of the tones are so dark, and that is OK. Just be careful to not underexpose the darks too much.

A sturdy tripod and a rock solid head are crucial in these kinds of shooting conditions. This was a long 30-second exposure, and you do not want anything to move even slightly.

Taking many exposures, and possibly using exposure compensation, is helpful. Give yourself many opportunities to get a good exposure and good sharpness.

Speaking of sharpness, it is possible to use autofocus even in these very dark conditions if you are careful where you focus. Find an edge where a dark area touches a light area. That enables the autofocus mechanism to lock in more easily. If you are comfortable manually focusing, that will work well also. Live View does not work well in darkness.

As the sky begins to lighten, switch gears and prepare to shoot sunrise. This will maximize your time, providing both night shots, as well as sunrise shots. Then treat yourself to a good cup of coffee and a hot breakfast.

TECHNICAL DATA
Shutter Speed 30 seconds.  Aperture f/8.  ISO 800.  Lens: Canon 17-40mm f/4L, set at 20mm.  Camera: Canon 40D.  Gitzo tripod with Really Right Stuff ballhead.

TODAY'S QUOTE: "Moonlight is sculpture."  --Nathaniel Hawthorne

Sunday, August 3, 2014

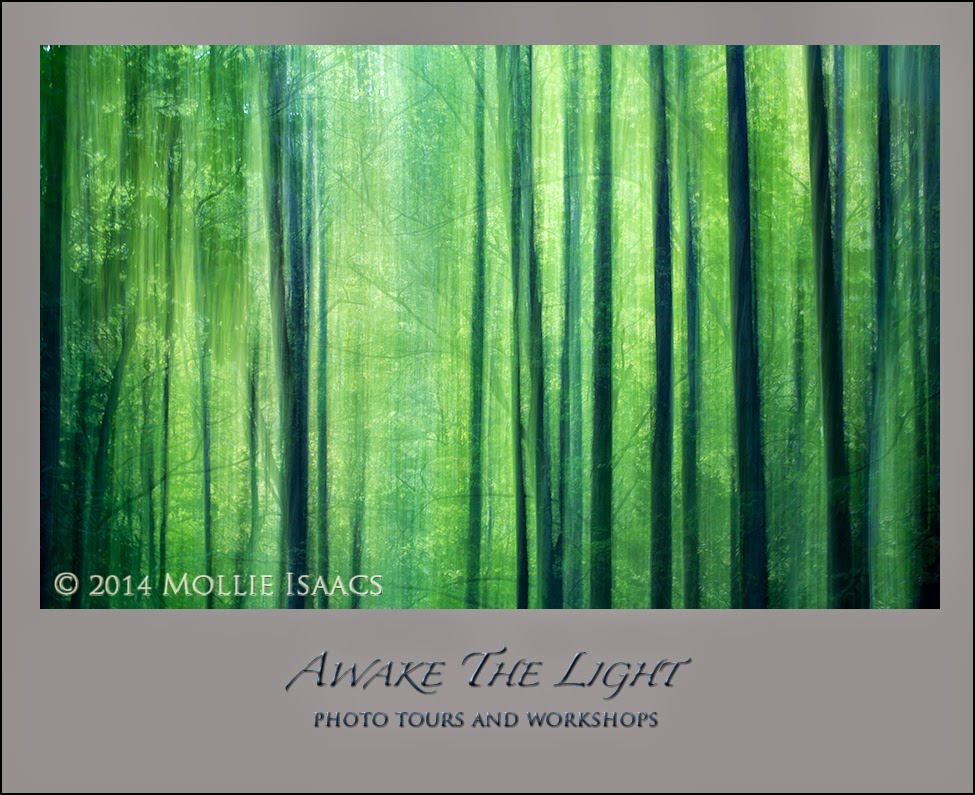
Sweeping Greens


The simplest of controls on your camera can produce exciting images. Using a fast shutter speed freezes motion, and a slow shutter speed shows motion. This image was created with the simplest of techniques  -  a slow shutter speed while slowly moving the camera vertically during the exposure.

The slow vertical "pan" during exposure works well for trees. It elongates their trunks while adding a hint of blur, providing an impressionistic look.

The slower the shutter speed, the more pronounced the blur effect. Try several different shutter speeds for each different subject, and then decide after you have downloaded your images which ones work better than others.

Be prepared for many unsuccessful attempts, but even if you get only one that you like, that is a good day. 

I always hand hold my camera for these kinds of images, but you could use a tripod if you prefer.

This was shot in summer, so all the tones are green with a hint of yellow. Autumn will provide a greater array of colors.

Try to avoid showing any sky since it will appear bright white and can be distracting.

TECHNICAL DATA
Shutter Speed 1 second.  Aperture f/29.  ISO 100.  Lens: Canon 100mm macro f/2.8L IS.  Camera: Canon 5D Mark III.  Handheld.

TODAY'S QUOTE: "Make the most of today. Let the winds of enthusiasm sweep through you. Live today with gusto."  --Dale Carnegie

Friday, August 1, 2014

Serendipity


Serendipity, luck, coincidence. As photographers we will take whatever Mother Nature decides to give us. When you set out in the morning, you probably have a destination in mind, but not a clear sense of what kinds of images will come your way. Famous photographer Minor White had a very Zen view of life, and said that often you come upon a scene just when the gods are ready for you to trip the shutter.

That was definitely the case with this image. It was autumn in the Great Smoky Mountains National Park, and the leaves were turning yellow. On this sunlit day, the sky was blue with very few clouds. I was in search of moving water shots. Many were more typical shots of rushing whitewater in a mountain stream flowing over mossy rocks. But when I saw this, I realized it was something special.

The sunlit yellow leaves reflected in the water provided a golden glow, and the reflected blue sky was the perfect counterpoint. This liquid look of this image is unmistakable. It looks almost like liquid gold.

The best way to get good color in moving water is to shoot either early or late in the day when the stream is in shade, but the trees and shrubs along the far bank are in sun. So the water will be evenly lit with no hotspots and can beautifully reflect the color along the shoreline.

In springtime the colors will be more yellowish green, and in the fall there will be more yellows, golds, oranges, and reds. The clearer the sky, the more blue will be reflected in the water.

Of course when shooting moving water you will need a tripod and a long shutter speed. Experiment with different shutter speeds from about 1/4 sec to several seconds. You never know which one will provide just the look you want.

For good depth of field and sharp images, use an aperture of at least f/11. And to avoid noise (grain) use an ISO of 100.

TECHNICAL DATA
Shutter Speed 1/3rd sec.  Aperture f/14.  ISO 100.  Lens: Canon 70-200mm f/4L IS set to 200mm.  Camera: Canon 5D Mark III. Gitzo tripod with Really Right Stuff ballhead, and Wimberley Sidekick.

TODAY'S QUOTE: "In an age when man has forgotten his origins and is blind even to his most essential needs for survival, water ... has become the victim of his indifference."  --Rachel Carson